Monday, March 26, 2012

DIY : Original Place Cards

A few days before Easter, and before the wedding season starts, here is a little tutorial to help you create original place cards !

These place cards aren't simply put on the table or on the guests plate, but directly attached to their glass stem.


The image above is the model I used for my wedding.
("Il était une fois..." means "Once upon a time...")


The "professional" method with printing :

1) I used Paint Shop Pro (it's the same with Photoshop) to apply my text in the roundness of the heart.
2) I customized each heart with the name of each guest.
3) Finally I printed it on glossy gold paper.
4) I cut each heart on its contours and on the center circle. To make it, I create a small slot that connects the circle with the "V" of the heart.
5) So, I can slide the place card on the stem of each glass.


Hand-crafted method :
This method has the advantage of not requiring any software or printer ! So, it is good to use for small parties.

1) Cut out the pattern of the chosen shape in a sheet of cardstock. Don't forget to draw a central circle to insert the place card on the stem of the glass (like the previous method).
2) Use the pattern to trace the outline of the shape on the chosen paper according to the decorative theme.
3) Cut each place card following its outlines (and its central circle).
4) Write, with a marker or a glitter pen, the name of each guest.
5) Place each place card on the stem of the glass of each guest.


Bonus :
If you wish to create a star but you don't know how to draw one perfectly, here's a little explanation I found in Pinterest (I must confess I haven't tested it yet).


For Easter, you could create shapes of chicks, rabbit heads, ...

Thursday, March 22, 2012

Polymer Clay : Funny Jewelry !


I succumbed, like many of you, to creating jewelry with polymer clay, a few months ago.


For novices, this is like the modelig clay of our children. We can find it in all colors, even glitter, metallic, transparent, or luminescent (that light up at night).


Mister Fimo is very smart, because he knows that we like to have a lot of coordinating accessories ! It worked when we were young with our Barbies : I had the kitchen, the car and even the husband !!!
It still works today, with a little cocktail dress, we must necessarily buy the shoes, the handbag and matching jewelry... even make up !
So, Mr. Fimo thought of us and sells a whole bunch of accessories : spatulas, molds, graters, kits (with different colors), ... In short, everything we need to be polymer clay artists !

You just have to bring your imagination to create and fire your objects.

For this first post on my polymer clay jewelry, here are 2 very simple rings (but very pretty). I've called these 2 : "Remember the 80's". 


They come in all colors. Here in blue and pink.
If you have any special requests, feel free to ask !

Wednesday, March 21, 2012

DIY : Wee-Wee Proof Cones


A new tutorial/DIY for today : how to make your own "wee-wee proof cones" for baby boys !


As a future mum of a little boy, all my friends have cautioned me : "prepare a lot of towels because you're going to be attacked during each diaper change"...
Me ? Be attacked ? By my baby, my wonder of the world ? No way !!!
And yet...
Even if I can't be sure about it for my baby (because he isn't yet born), I noticed that this statement was exact with the baby boys of my friends. The little guys seem to love to pee when their penis is in the open air : on the person who changes them, or even on themselves !

As usual, I used my friend Google to find solutions.
So I typed "how to protect myself from pee-attacks", or "how to avoid getting peed on by my baby", ... but without any success !

Fortunately, thanks to the US blogs I read, I discovered a magical object : the wee-wee proof !

This is actually a small cone with felt or terry-towelling to place on the penis of the baby during the change. The thick fabric will absorb the urine and you will just have to wash the cone rather than the walls, the floor, the baby and... YOU !
But, I can't find it in France ! So, I decide to make it by myself for my future baby and for my friends !


How to make it ?

1) Prepare the materials :
- a sewing machine
- terry-towelling
- cotton fabric
- scissors
- a piece of cardstock
- a fabric pencil
- pins

About the terry-towelling, I had a good quality towel... but pierced ! So, instead of throwing it away, I've used it for my project.

2) Using a model, draw a circle on the cardstock to make a pattern.
Personally, I used a bowl (upside down) to get the desired format.


3) Use the pattern to cut out circles in the fabric and in the terry towelling.
Then cut each fabric circle in 2 semi-circles.


4) Place 1 semi-circle of terry-towelling and 1 semi-circle of cotton fabric right sides together, using pins. Then, sew just on the round edge.


5) Return the project to put the fabrics wrong sides together, and hide the seam.


Fold the project in half along the rounded to obtain a quarter circle (using pins). The cotton fabric must be inside.


6) Sew the straight edge (the only edge not folded or sewn).

Return for the last time the project to hide the seam and get a cone (terry-towelling inside and cotton fabric outside).


The cones are ready to be used !!!


And for those who still don't understand the use of this object, Mr. Duck has agreed to be our model today.


Tuesday, March 20, 2012

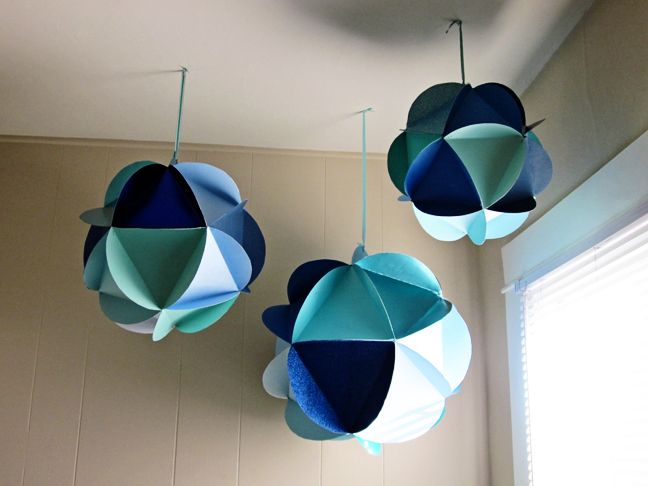
DIY : A Globe Paper Mobile


I posted on Facebook some photos of my decor for the nursery of our future little boy. Some of my friends (and family) were particularly interested in one thing (to copy me !!!!) : my colored paper globes.


First, the idea came to me by reading the blog of Paige Evans, one of my favorite US bloggers. Since the walls of the nursery would remain white, I had to find something to cheer. Here's THE solution...
The One with the First Nursery Item and Other Baby Stuff

Unfortunately, I haven't found a tutorial on internet, but because I'm not really too stupid (yes, it's possible !), I easily managed to create these globes by myself.
And because I'm very (too?) nice... here's the way to do it !!


1) Cut out circles of paper (the size of the circles depends of the size of the globe you want). You have to choose a thick paper, like scrapbooking paper.

2) Draw an equilateral triangle which passes by the edges of the circle. Then fold the edges on the lines of the triangle.
To make it easier, I used a circular protractor and I put a mark in degrees 0, 120 and 240 to draw the triangle. So easy !!

3) Repeat this, cutting and folding 20 paper circles.
The result is prettier using a monochrome or matching colors.


4) Glue the circles edge to edge.
Each globe has 5 circles above, 10 circles staggered to the middle row, and 5 circles in the bottom.

5) Don't forget to put a link inside the globe to hang it !

Here's the final result !!!

It's your turn, now !

Sunday, March 18, 2012

Pinspiration : Baby Pirate


As a good future mum, I use Pinterest to find ideas for my baby.
Follow Me on Pinterest

And because, I looooove pirates, I must confess I enjoy searching ideas to dress my baby or decorate his nursery.


A beautiful bib to avoid getting himself dirty after his pirate drinking session !


Source: shirtcity.fr via Julie on Pinterest


A rhinestone skull baby onesie...


Failing to find a hat like that, I'd have to knit one (it may be difficult because of my knitting level) or buy a black hat and embroider a skull on it !
Source: celebuzz.com via Julie on Pinterest


And beautiful little silver slippers... to buy !!!
Source: shopmania.fr via Julie on Pinterest

Saturday, March 17, 2012

DIY : A Heart of Frames


With the success of my decorative project on my old blog, I tought I had to republish it today on Raspberry Ju[ice].

This is a February 2010 post, when we moved into our current apartment.


While Jack deals with "man's work" (just to flatter him !), I take care of the decoration of the main room. I chose to "define" the dining area by painting the walls in taupe. The result is very pretty but a bit dark, so I decide to do a white project to remind the other walls...


First idea : Put stickers on our large white closet doors.


2nd idea : Create a personal decoration on our taupe wall.
The idea, I found it on this Marie Claire magazine...

... and then I adapted it !


How to do it ???

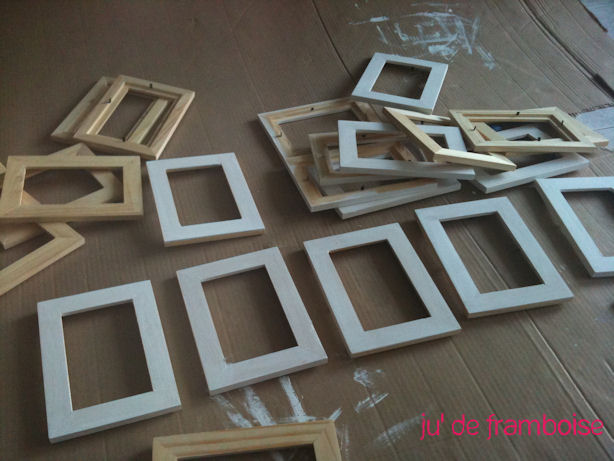
1) Buy 36 frames of the same size (and as many frame ties, of course !).
For my part, I found cheap frames from Ikea (RAM by 3, in pine).
2) Paint the frames in the chosen color.

3) Draw, on a large sheet of very thin paper, a sketch of our heart.
I used a roll of gift wrap that I had since Christmas, and on the reverse side, using a frame as a model (by tracing its outline), Idrew the location of all my frames. Be careful to respect the symmetry !
Hang the drawing on the wall where you want to bring up the heart.

4) Nail down !!!
Nail through the paper to respect our sketch.

5) Tear the paper up !
That's why it's very important to choose very thin paper ! I had no trouble because my paper was already beginning to tear itself...
Even if we need to evacuate all the stress in this stage, don't pull the paper as a crazy girl :)

6) It only remains to install the frames and place your favorite photos...


So ? What do you think of it ?
Feel free to ask me your questions !

Thursday, March 15, 2012

The first, but not the last !

 Hello to you all !!!

After many "test blog", here is the final version of my project.
I first started a diary blog, then a feminine blog. As I wanted to integrate the presentation of my work, my projects and my tutorials, I decided to launch a more general blog where I could mention all my passions !

I certainly hope you will find here everything you can search... and more !!!